art

DIY Thumb Print Vase

Hello everyone! It's been a while since I have posted a DIY. I have been busy creating drawings and paintings, but I haven't actually made a "craft" in a while that I could share with you.

I wanted to create a bottle that had an all-year round design, texture, and that was sculptural. So I have created a vase that  I have wrapped in Air-Dry Clay that I purchased from Michaels with a coupon. Woot woot!
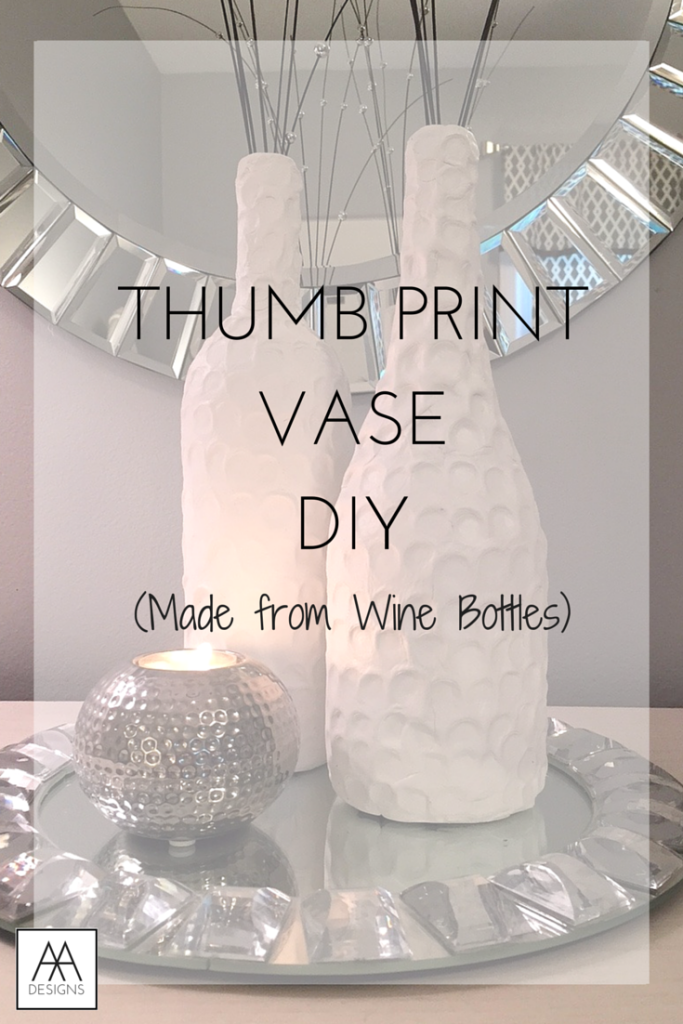
Wine Bottle DIY

For this Tutorial you will Need:

- A Wine Bottle or Canister of your Choice

- Air Dry Clay (I used White so I could spray paint it if I wanted to)

- A rolling Pin

- Exact-o Knife

- Thumbs ;)

Step-by-Step Tutorial

Step 1: Select bottle

Step 2: Clean Bottles and take off labels with Hot soapy water

Step 3: Roll out Air-dry clay into a big rectangle (easier to work with). Roll out thin

Step 4: Wrap clay covering as much of the bottle as possible

Step 5: Cut off Excess clay with Exact-o Knife

Step 6: Use Excess clay to cover top of bottle

Step 7: Blend in creases with your fingers the best you can by using a rubbing or patting motion. I also rolled it on the table to even out the clay.

Step 8: Take your thumb and apply pressure to the clay to make rows of thumb prints starting at the bottom until you reach the top.

Step 9: Let clay air-dry for 24-48 hours (varies upon thickness)

Step 10: Spray paint bottle in the color of your choice and/or add branches/flowers for decoration

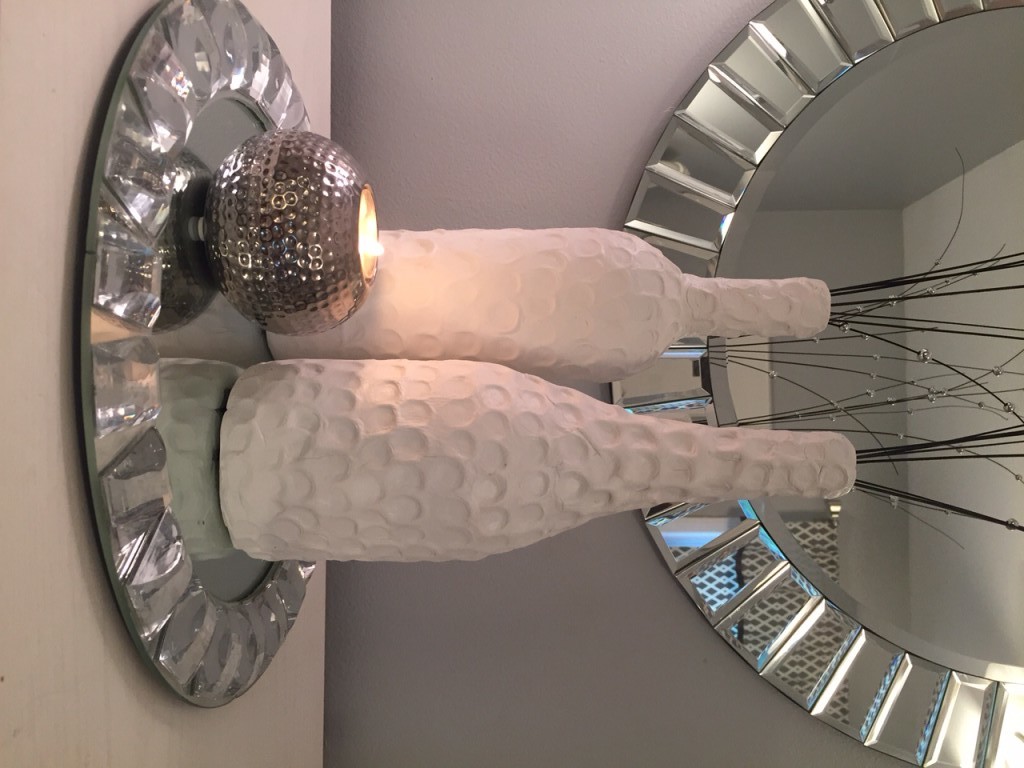
Here is the finished result!


IMG_2238


Want more design tips? Join "The Designed Life" monthly e-magazine, filled with tons of inspiration for the home and life. Also, receive a free Home Design Checklist to make your next shopping trip for your home easier.


Revive Old Planters with this Simple DIY!

'Tis the season to be sneezin' .. This Spring has got me suffering with allergies. Regardless, I am still spending time outdoors and finishing up outdoor chores before summer BBQ's start. Last weekend during Mother's Day, my mom and I went to pick out new flowers for outside (Mother knows best). As we prepare to plant the new flowers, I realized that our flower pots needed a major revival. It was only necessary that I stop everything I was doing and run to grab all my painting supplies.

Here is a Quick Step-by-Step Tutorial to Revive your Outdoor Planters:

For this project you will need:

A tarp to cover the ground, Paint of your choice (Either Spray paint or Acrylic), a ceramic or plastic pot, protective spray coat (optional), stencil (optional)

1. Wash & Scrub existing planter. It is important that you have a clean slate to work on. Wash away dirt and sometimes spider webs hidden under the lip of the planter (gross)

2. Place tarp down to protect the floor and ground around you.

3. Paint the body of your planter with two coats of paint in the color of your choice. You can leave it solid and stop here or use this color as a background color and move on to the next step.

4. (Optional) Apply a Stencil or tape out stripes or a design of your choice. Color in your stencil with paint.

5. (Optional) After the paint has dried, add a protective top coat.

Here is the final result. I may go back in and add a design to the Cobalt blue pot. I am thinking of a Chinoiserie pattern because I am loving Blue & White right now. If you haven't been following me, check out my post from two weeks ago, "Chinoiserie Chic Decor".

After

FullSizeRenderI also painted a few solid yellow pots to coordinate with the sunflower stenciled pots which aren't photographed because I am waiting for my plants to grow. I didn't want to show you a pot of dirt :)  I'll share the growth on Instagram @byamadesigns.

Here are some other Pinterest-worthy designs that I would like to attempt in the future.

fabric wrapped

(Photo via In my Own Style)

rock-covered-bucket-cg

(Photo via Centsational Girl)

Gardening is not my forte. What are some of your favorite outdoor plants and flowers? Share your favorites (especially flowers deer & other animals won't eat). I would love to know!

I hope you enjoyed this post. If you love this post, share it with your friends and pin it to Pinterest to come back this craft idea later.

Hope your day is as awesome as you are! :)

Want more design tips? Join "The Designed Life" monthly e-magazine, filled with tons of inspiration for the home and life. Also, receive a free Home Design Checklist to make your next shopping trip for your home easier.

Design Trend: Blue Hues in Home Decor

Boy oh boy, do I have the case of the blues (not the boo-hoo blues)!! Shades of blue were introduced at High Point Market this Spring. In the fashion industry, Pantone may have announced "Marsala" to be the fashion color of the year but blue is the color of the year in furniture, accessories, and home decor as well. Today I will be sharing my inspiration and home decor in bright blues that you can add to your home and reinvent your space.

8a81577c6f58e45a5a9f14dc92dfd157

If you follow me on Instagram, I shared my inspiration of a vignette with vibrant blue plantation shutters and moroccan tile around it. Pigmented blue hues ranging from royal to indigo to watery azure are trending for this season on the runway and in home decor.

Introduce shades of blue to any decorating palette in doses or as the main focus. Blue plays well off of primary colors such as yellow or red for a bold impact. Pair blue with orange for a energetic color combo. On the contrary, couple blue hues with purple or green for soothing and cool palette. Blue could also serve as an accent color when paired with neutrals like the room featured below.

c70e1abd50d8a6669f68dfe9b77f4cff (Photo via 6th Street Design School)

Whether you choose to add vibrant blue tones in big way or subtle way, I have found a few options that will suit your decor needs. Here are some blue decor ideas that you can incorporate into your home.

FAB FRIDAY

1. Silk Pillow // 2. Cobalt Table Lamp // 3. Porcelain Chinoiserie Vase // 4. Indigo Scarf // 5. Tufted Sofa // 6. Botanical Watercolor Art // 7. Hall Chest // 8. Ikat Rug

Did you find something you liked? Pin this image to your Pinterest board so you can shop later. Are you following me on Pinterest? Let's be friends :)

http://pinterest.com/byamadesigns/

For current photos of my work and progress photos, follow AMA Designs on Facebook or Instagram.

Want more design tips? Join "The Designed Life" monthly e-magazine, filled with tons of inspiration for the home and life. Also, receive a free Home Design Checklist to make your next shopping trip for your home easier.

Inspired by Fashion: Chinoiserie Decor

The Metropolitan Museum of Art is hosting its "China: Through the Looking Glass" Costume Institute Benefit Gala. During this event celebrities and fashionistas alike gather for the style world's biggest night of the year. Various famous designers will be featured in the exhibit such as Cristobal Balenciaga, Travis Banton, Bulgari, Sarah Burton for Alexander McQueen, Callot Soeurs, Cartier, Roberto Cavalli, Coco Chanel, Christian Dior, Tom Ford for Yves Saint Laurent, Valentino Garavani, Ralph Lauren, Christian Louboutin and many more. Chinoiserie print strongly debuts in this exhibit. Not only does this event mark a pivotal point in fashion but the interior design industry as well. If you are unfamiliar with the term "Chinoiserie," it is a print that reflects Chinese artistic influences.

In today's post, I will be sharing how to incorporate Chinoiserie decor into your home inspired by the popular fashion trend seen at the Met Gala.

China Through the Looking Glass

(Photo via gotamist.com)

The Chinese-esque pattern is impacting decor for the home with fabric, wallpaper, and accessories. Incorporate Chinoiserie decor by grouping porcelain blue and white ginger jars for a more decorative and temporary approach like the room below.

house beautiful

Designer and Blogger, Erin Gates featured chinoiserie decor in her guest bedroom by framing fabric on either side of the bed. I adore this transitional incorporation of the pattern.

Erin-Gates-Newton_008

(Photo via Erin Gates, Elements of Style)

Elements of Style

(Photo via Erin Gates, Elements of Style)

[houzz=http://www.houzz.com/photos/110000/Hollywood-Residence-transitional-living-room-los-angeles]

For a dramatic look, Los Angelos designer, Elizabeth Gordon added gold chinoiserie to the ceiling with a decorative ceiling mirror with a gorgeous guided frame. Whether you choose to introduce this Chinese-chic pattern in a bold way or a small way, Chinoiserie is a trend that is here to stay. Chinoiserie is a classic pattern that has evolved through design and making a modern comeback in fresh color palettes.

 transitional

If you are feeling super inspired by this fashion-forward trend, comment below! Will you be visiting The Metropolitan Museum for the exhibit? If you are into fashion, design, art -- I urge you to go! I went to The Met for the Alexander McQueen exhibit, it was beyond inspiring. It was such a memorable experience. For a preview of the "China: Through the Looking Glass" exhibit, visit this gallery from Vogue.

Want more design tips? Join "The Designed Life" monthly e-magazine, filled with tons of inspiration for the home and life. Also, receive a free Home Design Checklist to make your next shopping trip for your home easier.

Small Balcony, Large Style. How to Deck-Out your Deck

If you follow me on Instagram, you may have seen a small and stylish balcony that truly inspired me. Hours later, I spent the rest of my night on Pinterest gazing over many more trendy decks. So I figured, why not share my lovely findings with you?! As the weather continues to warm up, we start to spend more time outdoors. Your backyard is an extension of your home to relax and entertain. If you live in an apartment and don't have a backyard, why not deck-out your deck? By adding the right elements, you can create a charming outdoor living space that you can retreat to by yourself or with friends.

How to Deck-Out your Small Deck or Balcony:

1. Conversation Seating - Create a comfortable seating arrangement that encourages conversation between guests. If you balcony is tiny, try adding two chairs with a small table in between.

small-balcony-design-ideas-39

2. Scaled Furniture - Finding furniture that fits a tiny balcony is a challenge. The furniture needs to be scaled to fit the space both in size as well as visual-space. The photo below is the perfect example. The furniture is light-weight and airy. The chair and sofa has an open base and back which draw your eye through the furniture making the space feel more open. If the furniture had a solid back and base, this balcony would feel heavy, small, and cluttered.

outdoor deck

3. Flower Garden - Flowers and plants not only add color to your balcony but create privacy as well. By adding a few tall plants along the edge of your railing you can obstruct the view from nearby neighbors. I love the hanging pots on the railing.

flower garden

4. Herb Garden - If you like to spend time cooking in your kitchen, why not have your own outdoor herb garden? The picture below is a great example of use of wall-space and I also enjoy the pop of color from the flower pots.

herb garden

5. Outdoor Rug - Make your balcony feel warm and inviting by adding an outdoor area rug. Rugs add interest and also ground furniture groupings.

6. Lights - I love using lantern Lights with candles outdoors. It creates a very warm and inviting setting. If you don't want to use candles, consider the battery operates votives and tea lights. For a similar feel, you could also add string lights and drape the railing or underneath an umbrella.

7. Umbrella - Protect yourself from direct sunlight by adding an umbrella for shade on sunny days.

8. Mesh Canopy - For buggy nights, add a mesh canopy to your balcony.

Deck with Canopy

9. Privacy - Create privacy from nearby neighbors by adding a decorative screen or even draping fabric along the railing.

small-balcony-design-ideas-34

10. Outdoor Art - Add art to your space that can withstand the weather such as metal or glass wall hangings or sculptures. You can even add wind chimes to add whimsy to your balcony.

small-balcony-design-ideas-15

I hope you enjoyed this post on how to deck-out your deck. Enjoy the warm months ahead and spend more time outdoors. If you loved this post, share it with a friend who has an apartment or a small balcony.

For more design inspiration, follow @byamadesigns on Instagram, Twitter, and Facebook.

Want more design tips? Join "The Designed Life" monthly e-magazine, filled with tons of inspiration for the home and life. Also, receive a free Home Design Checklist to make your next shopping trip for your home easier.

Fab Find Friday!

Happy Fab Find Friday everyone! This week I am sharing fabulous finds from One Kings Lane. One Kings Lane is also running a special for new members, if you sign up today you will receive $15 credit for purchases $30 or more. For easy shopping click the direct link for each coordinating number. Pin this post to your Pinterest page so you can revisit these beauties later!FAB FRIDAY (2)

1. Wingback Chair / 2. Pewter End Table / 3.Crystal Ball Lamp (Set of 2) / 4. Area Rug / 5. Nesting Tables / 6. Cowhide Ottoman / 7. Faux Orchids / 8. Agate Boxes (Set of 2) / 9. Skirted Ottoman / 10. Hammered Metal Side Table

Keepin' it Real with AMA - How it All Started...

Happy Tuesday everyone! Today's blog post is inspired by Alex Beadon, the Marketing Queen who encouraged me to participate in the "Feel Good Blogging Challenge". I'm up for the challenge, so let's do this!! ABOUT ME

For those of you who do not know me, my name is Amanda and I am SO GLAD you are here!  I am from New Jersey, that's right - born and raised. Although, I would love to explore other states and countries :) I have always been a creative person and extremely organized.

I have always had a passion for the design industry growing up. I was born into the business. My family owned a construction business at the time. I remember sitting on the backhoe with my dad thinking it was coolest thing I have ever seen!! My childhood consisted of visiting job sites, drawing on the drafting boards, and playing in trailers while my Grandpa was reading blueprints.

My playdates consisted of me organizing my friends playroom closets, moving furniture, and redesigning the Barbie house. At 6 years old, I had parents calling my mother asking me to come over to help them design the layout of their space.

Today, I continue my passion as an Interior Designer. In my free time, I continue to spend drawing and creating. I love DIY projects!! I always say, "If you don't like it, spray paint it". I also love being outside especially during the Fall season and enjoy the leaves changing. Enjoying the outdoors is where I am most inspired. When it comes to relaxing and decompressing from the day, I love to enjoy a hot cup of tea, a good book, and of course yoga <3.

WHY I STARTED BLOGGING

I used to work as an Interior Designer at a furniture showroom. My clients wanted to stay connected and see what projects I was working on and thus, AMA DESIGNS was born!! It has been almost 2 years since I have started.

WHO IS MY BLOG FOR

My blog is for anyone who enjoys design and all things DIY. I want my blog to be a resource for people to visit and gain valuable tips for their home as well as being an inspiration to create something of their own. Designing a space doesn't have to have an expensive price tag to be beautiful! I want to share my design tips and advise for the homeowner who wants to create an amazing space and possibly save money along the way! :)

CURRENT DESIGN PROJECTS

I am working on a few exciting projects right now that I am so proud of. I am working on a kitchen renovation and bedroom space. I am SO anxious to share this project with you because I want to show you that renovating your kitchen can be done tastefully but without putting holes in your pocket. Wait until you see the floors.......

I am also working on a teen bedroom which looks fabulous. The client wanted to keep the existing wall color and furniture. It is absolutely amazing what a new floor plan, accessories, and window treatments can do! I also created hand-painted artwork customized for the space and made a nightstand with purple lucite hardware for the client. I will be sharing this project very soon - I am just waiting for a few pieces to arrive :)

TAKEAWAYS

After visiting my blog - I want people to feel inspired, entertained, and most of all encouraged to be productive and/or creative in their own way! Design is my passion and I want to be able to share it with my viewers :) I believe your home should be a reflection of yourself. Create an environment that you are excited to come home to everyday! What's better than coming home from a stressful day at work and melting into your favorite chair with a glass of wine? Mmmm, I am instantly relaxed just thinking about gazing out the window in my cushy sofa.

I hope your day is as AWESOME as you are!

With love,

AMA DESIGNS

Tickled Pink

I am not the girl who is typically drawn to pink but something about the summer has gotten me tickled pink! Pink has always been a hot color but more so this season. I have been seeing shades of pink all over - especially in fashion and design lately. Pink doesn't have to be just for a little girls room, pink can be sophisticated in the right shade. Watermelon pink is such a refreshing shade, especially for summer! The combination of red and pink is very bold yet provides warmth and excitement to any space or outfit. Another variation of this striking combination is pink and orange or pink and yellow. For a more dramatic look, black and pink creates a stark look. My personal favorite color combination is navy and pink. Something about that color combo is so striking!

If you are afraid of using pink in your home or wardrobe, try going more subdued. I like pairing khaki and coral together. It's the perfect color combination for summer. Another neutral color scheme that I find appealing is taupe and pink, or use coral as a substitute. Beiges and brown undertones will balance the bold hue.

20130715-144035.jpg

20130715-144058.jpg

20130715-144110.jpg

20130715-144119.jpg

20130715-144126.jpg